This is an old revision of the document!
How to implement a three-way Split View Controller using Storyboards
— Greg Neumann 2025/12/11 11:36
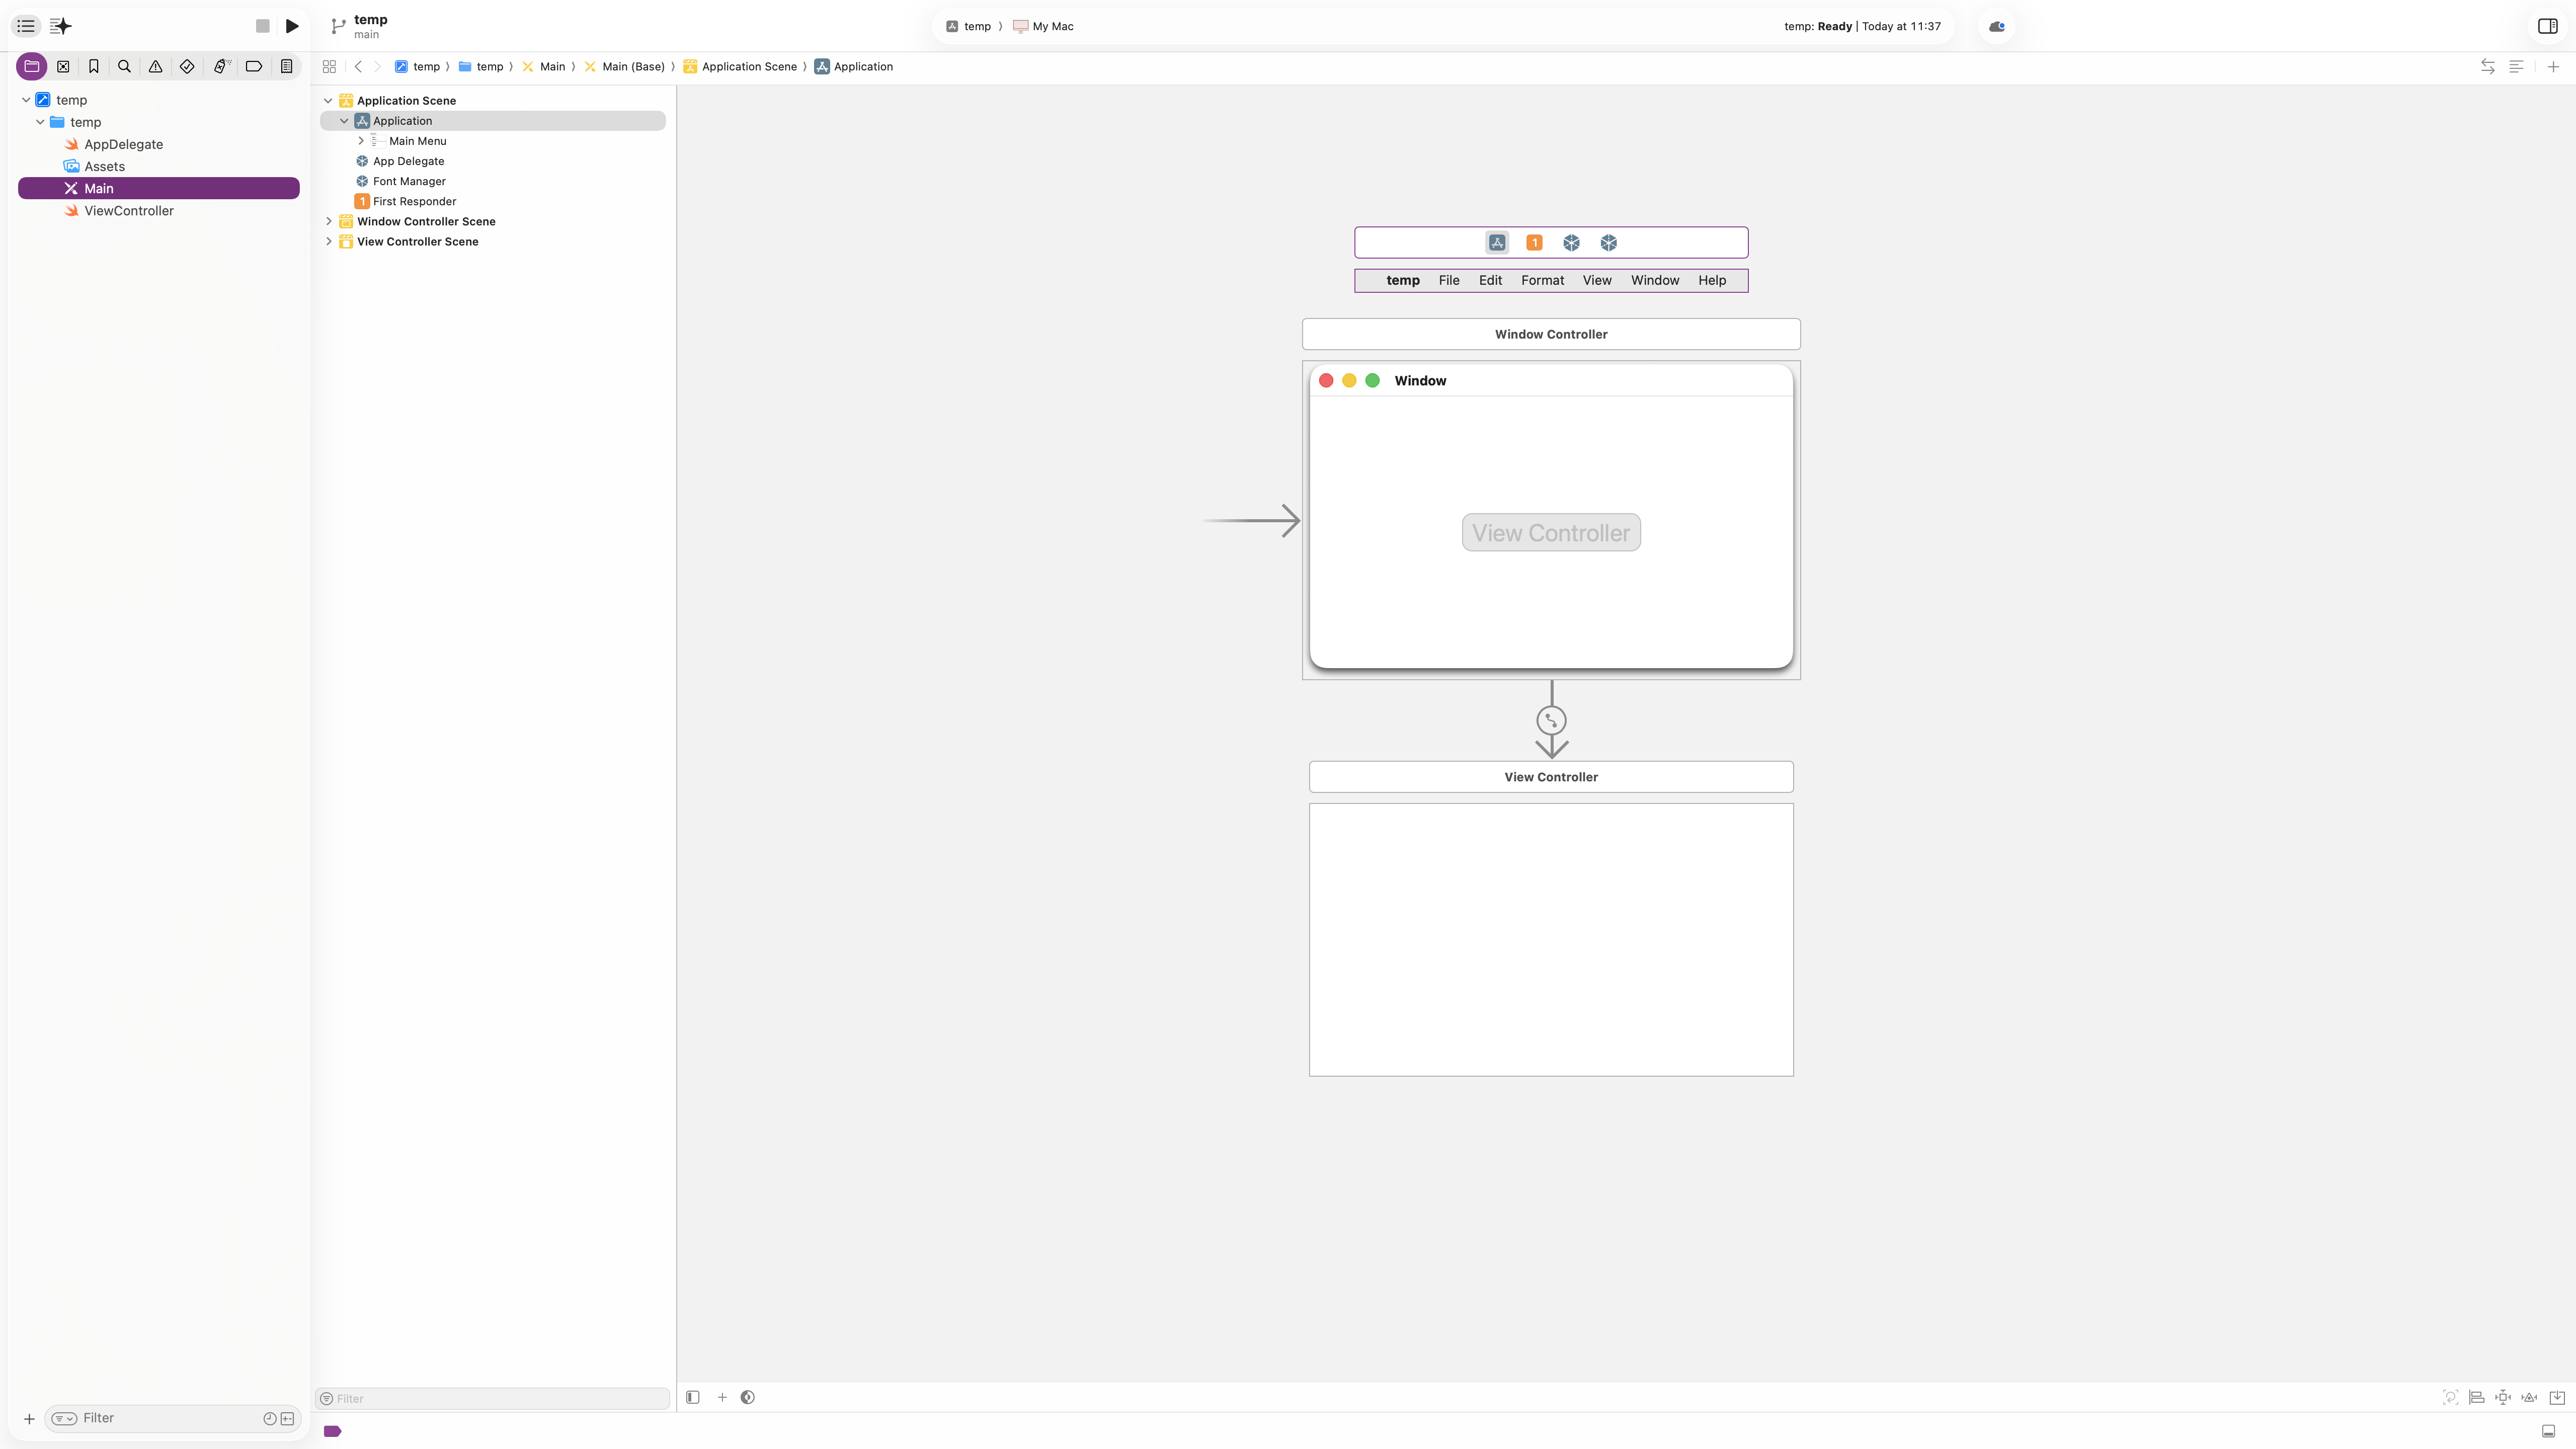
This is the default main storyboard layout in Xcode 26. To add a three-way NSplitViewController so that there are three panes visible on macOS, I fiest deleted the:
- Window Controller Scene and the
- View Controller Scene
By selecting them in the document outline on the left hand side and pressing the delete key. This then leaves just the Application Scene with it's Main Menu.
 Then use the Show Library command (Menu: View/Show Library or click the + character in the bottom toolbar on the RHS. Search for
 NSSplitViewController as shown …
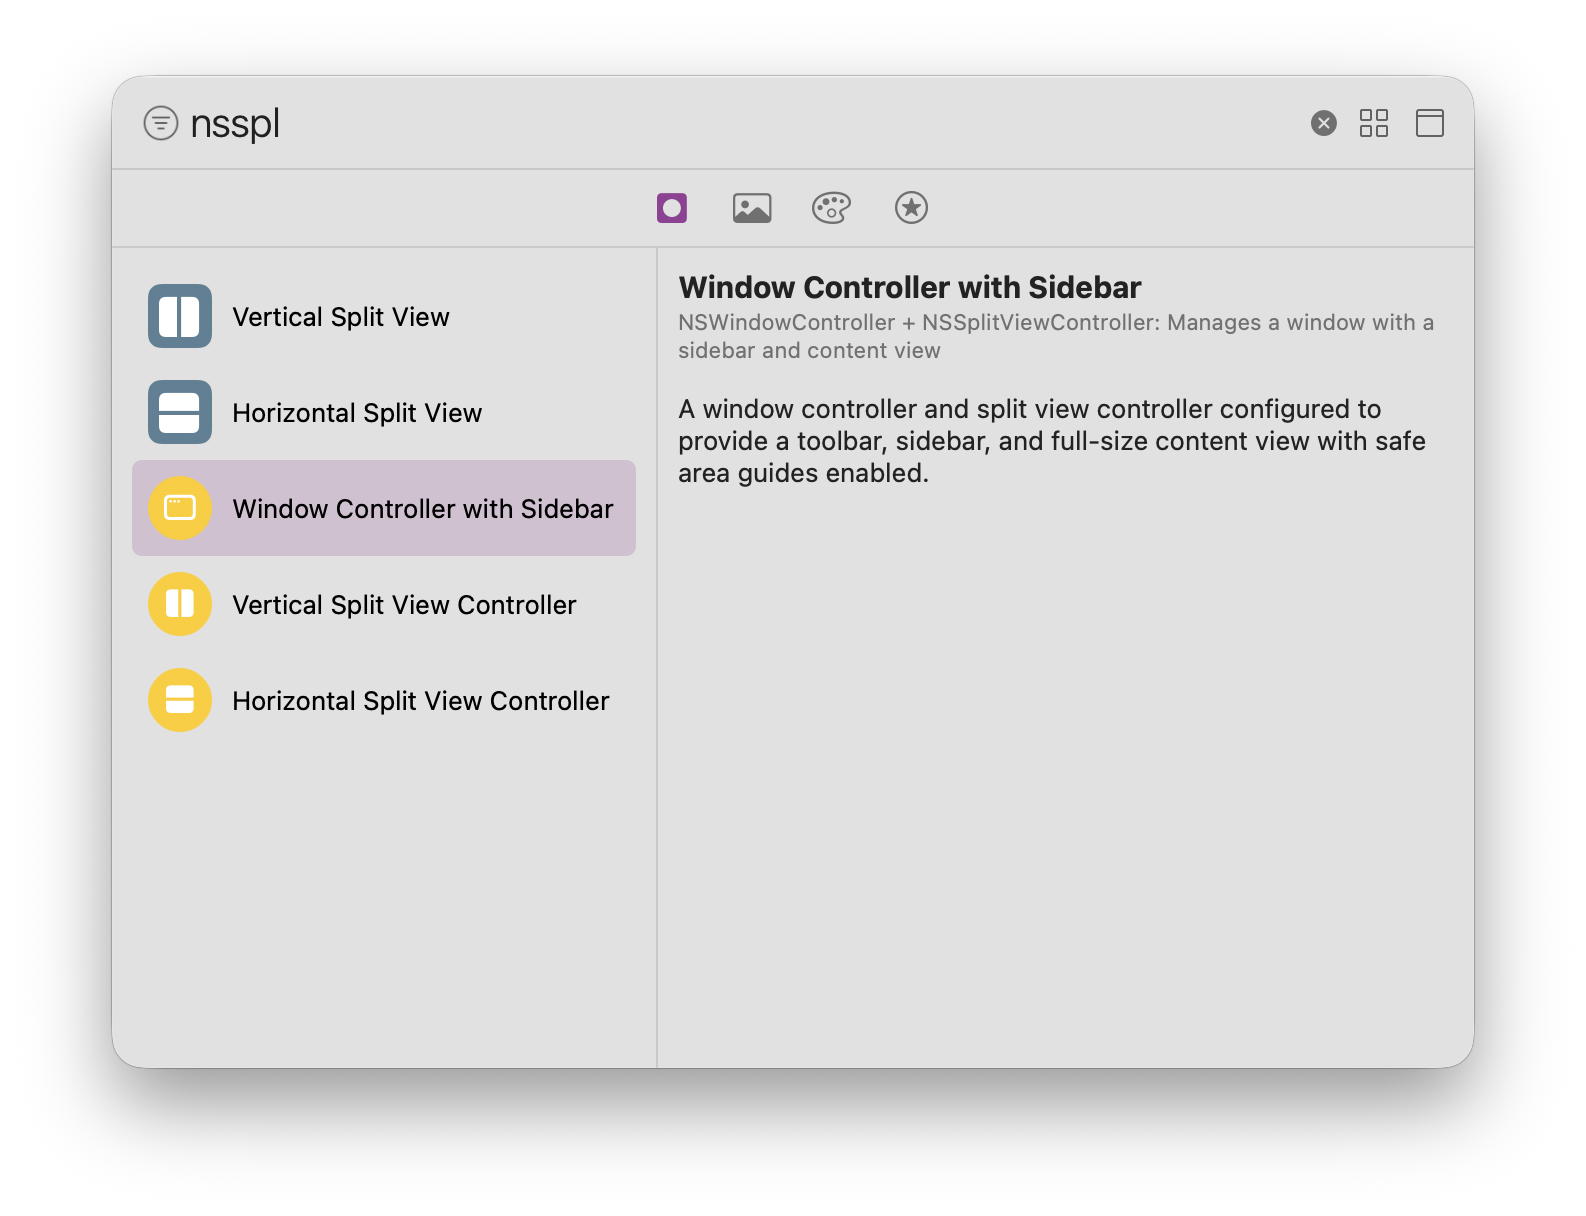 … and drag it onto the canvas anywhere:
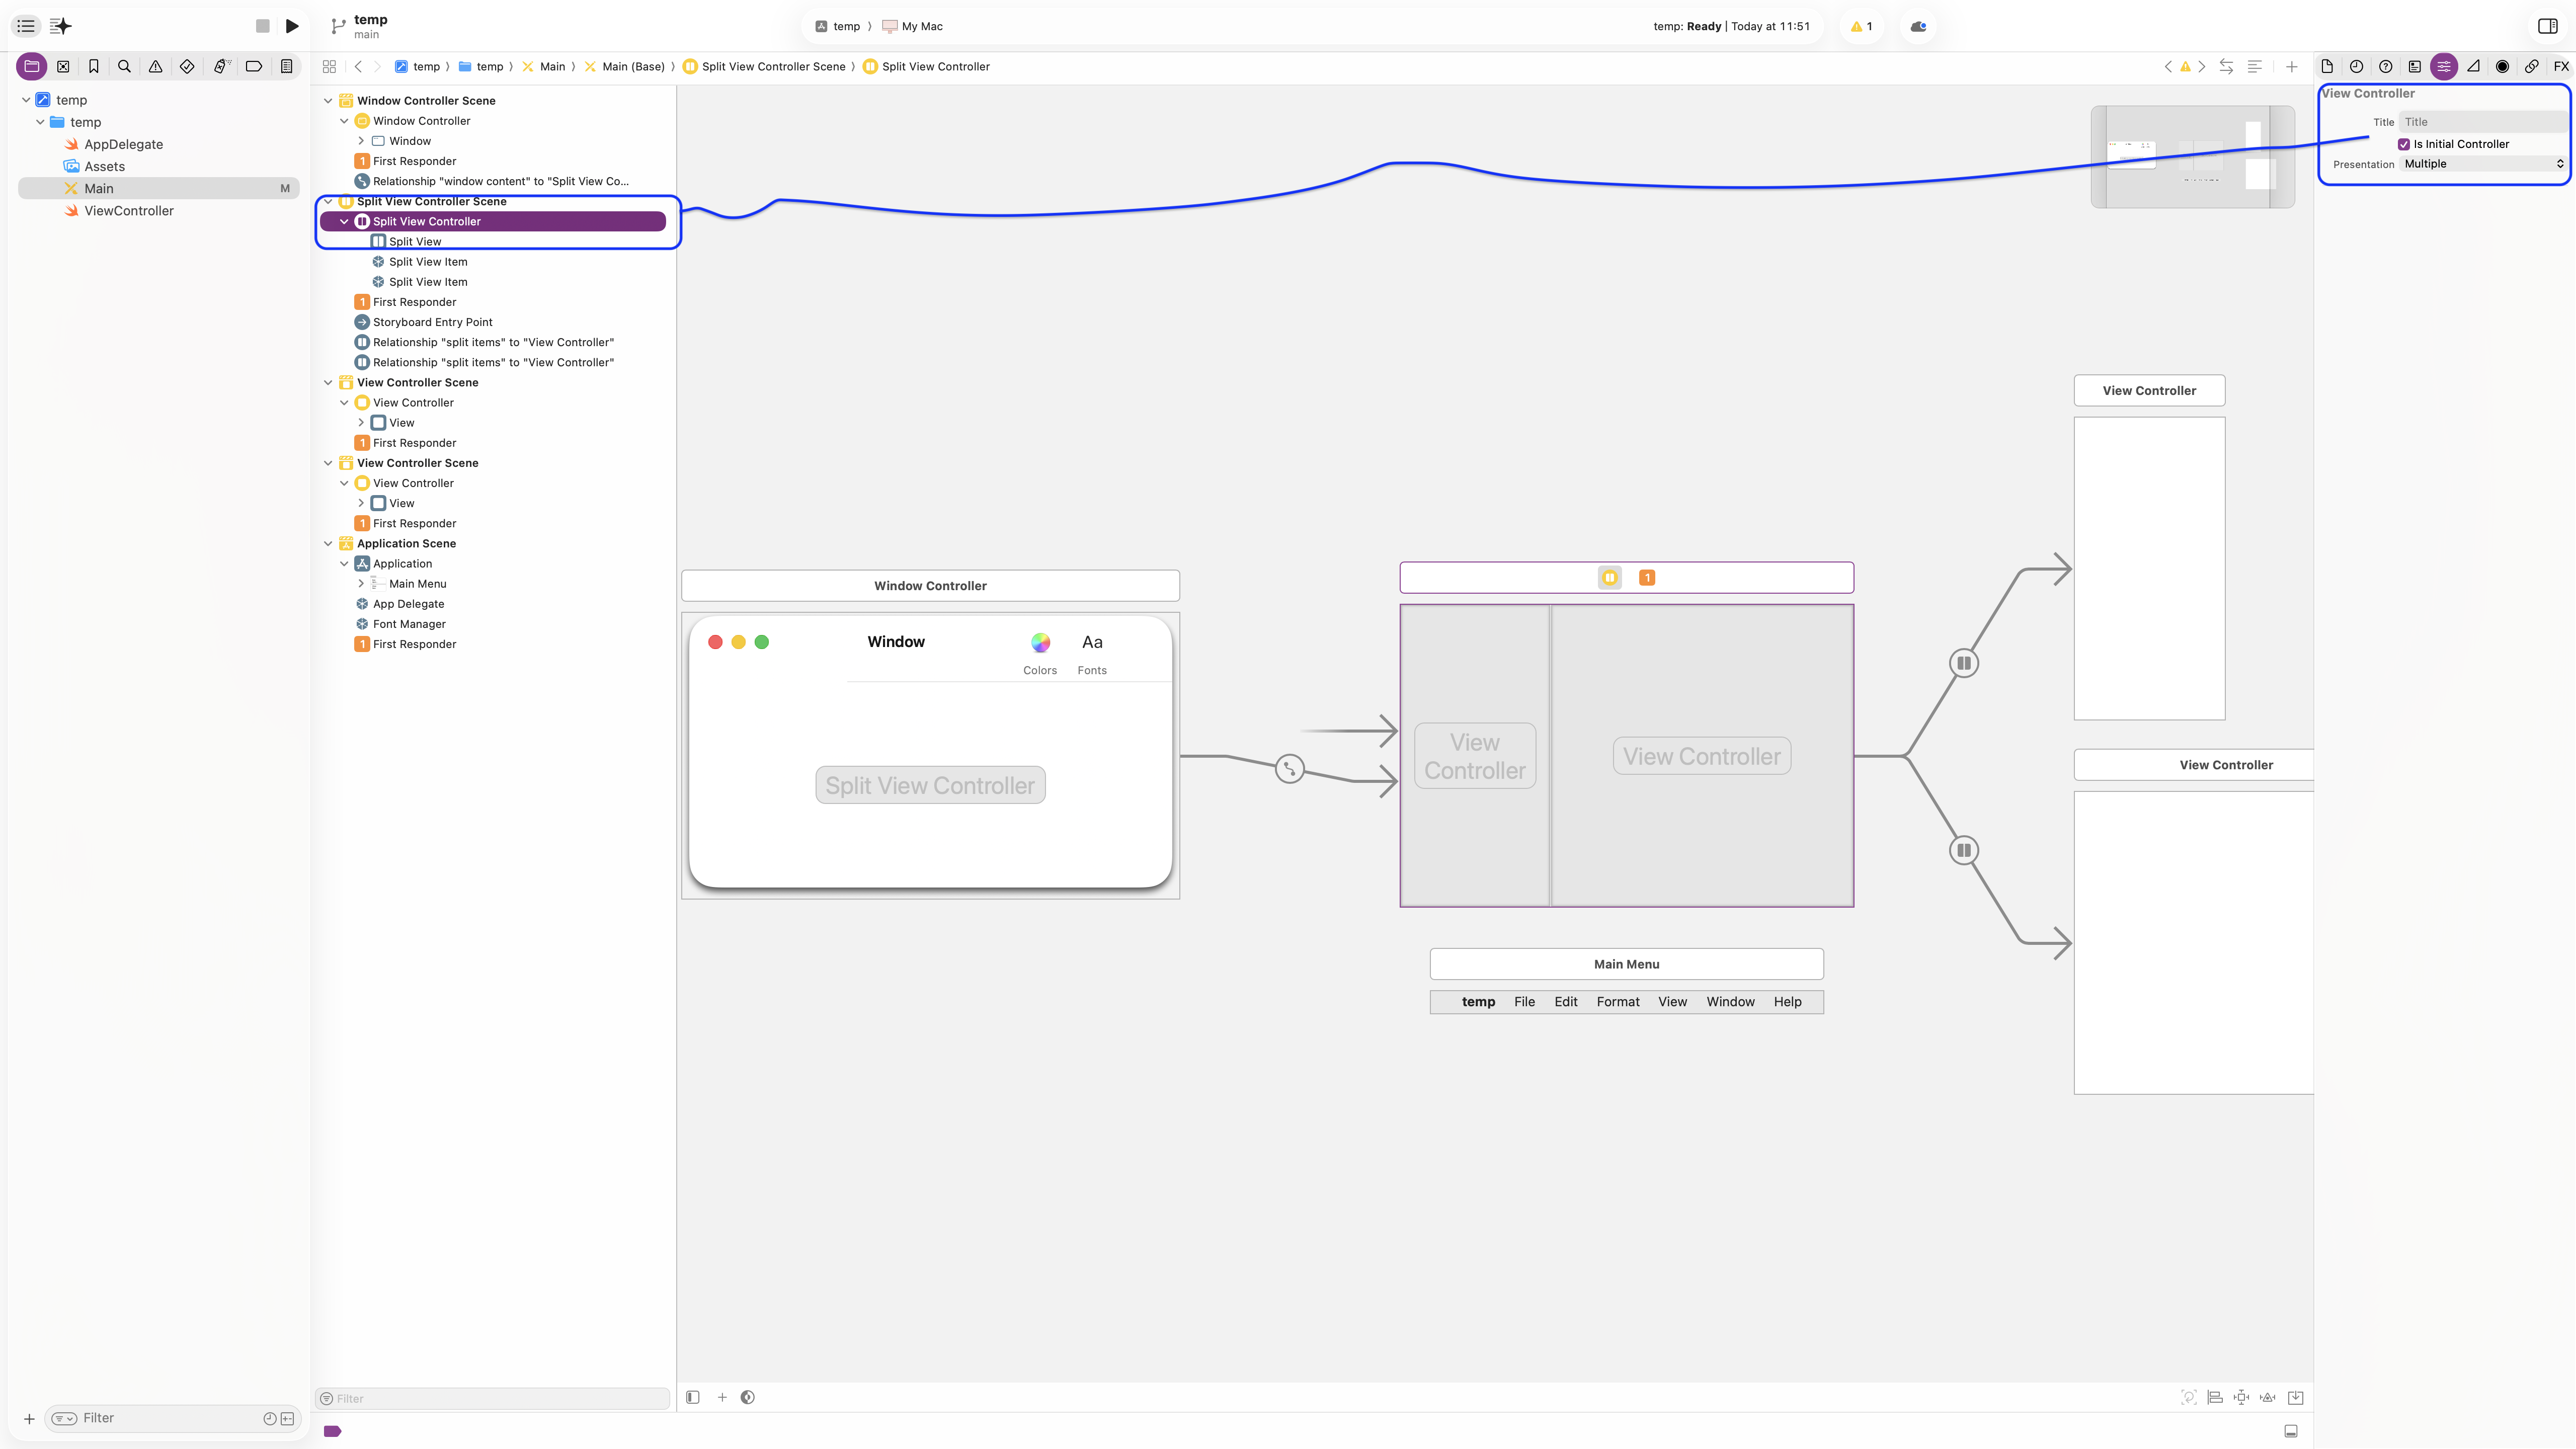
 Next, ensure that the Split View Controller is selected in the Document Outline. Then ensure that the Attributes Inspector is visible by clicking on the Hide or Show the Inspectors icon at the top right. The check the flag Is Initial Controller as shown:
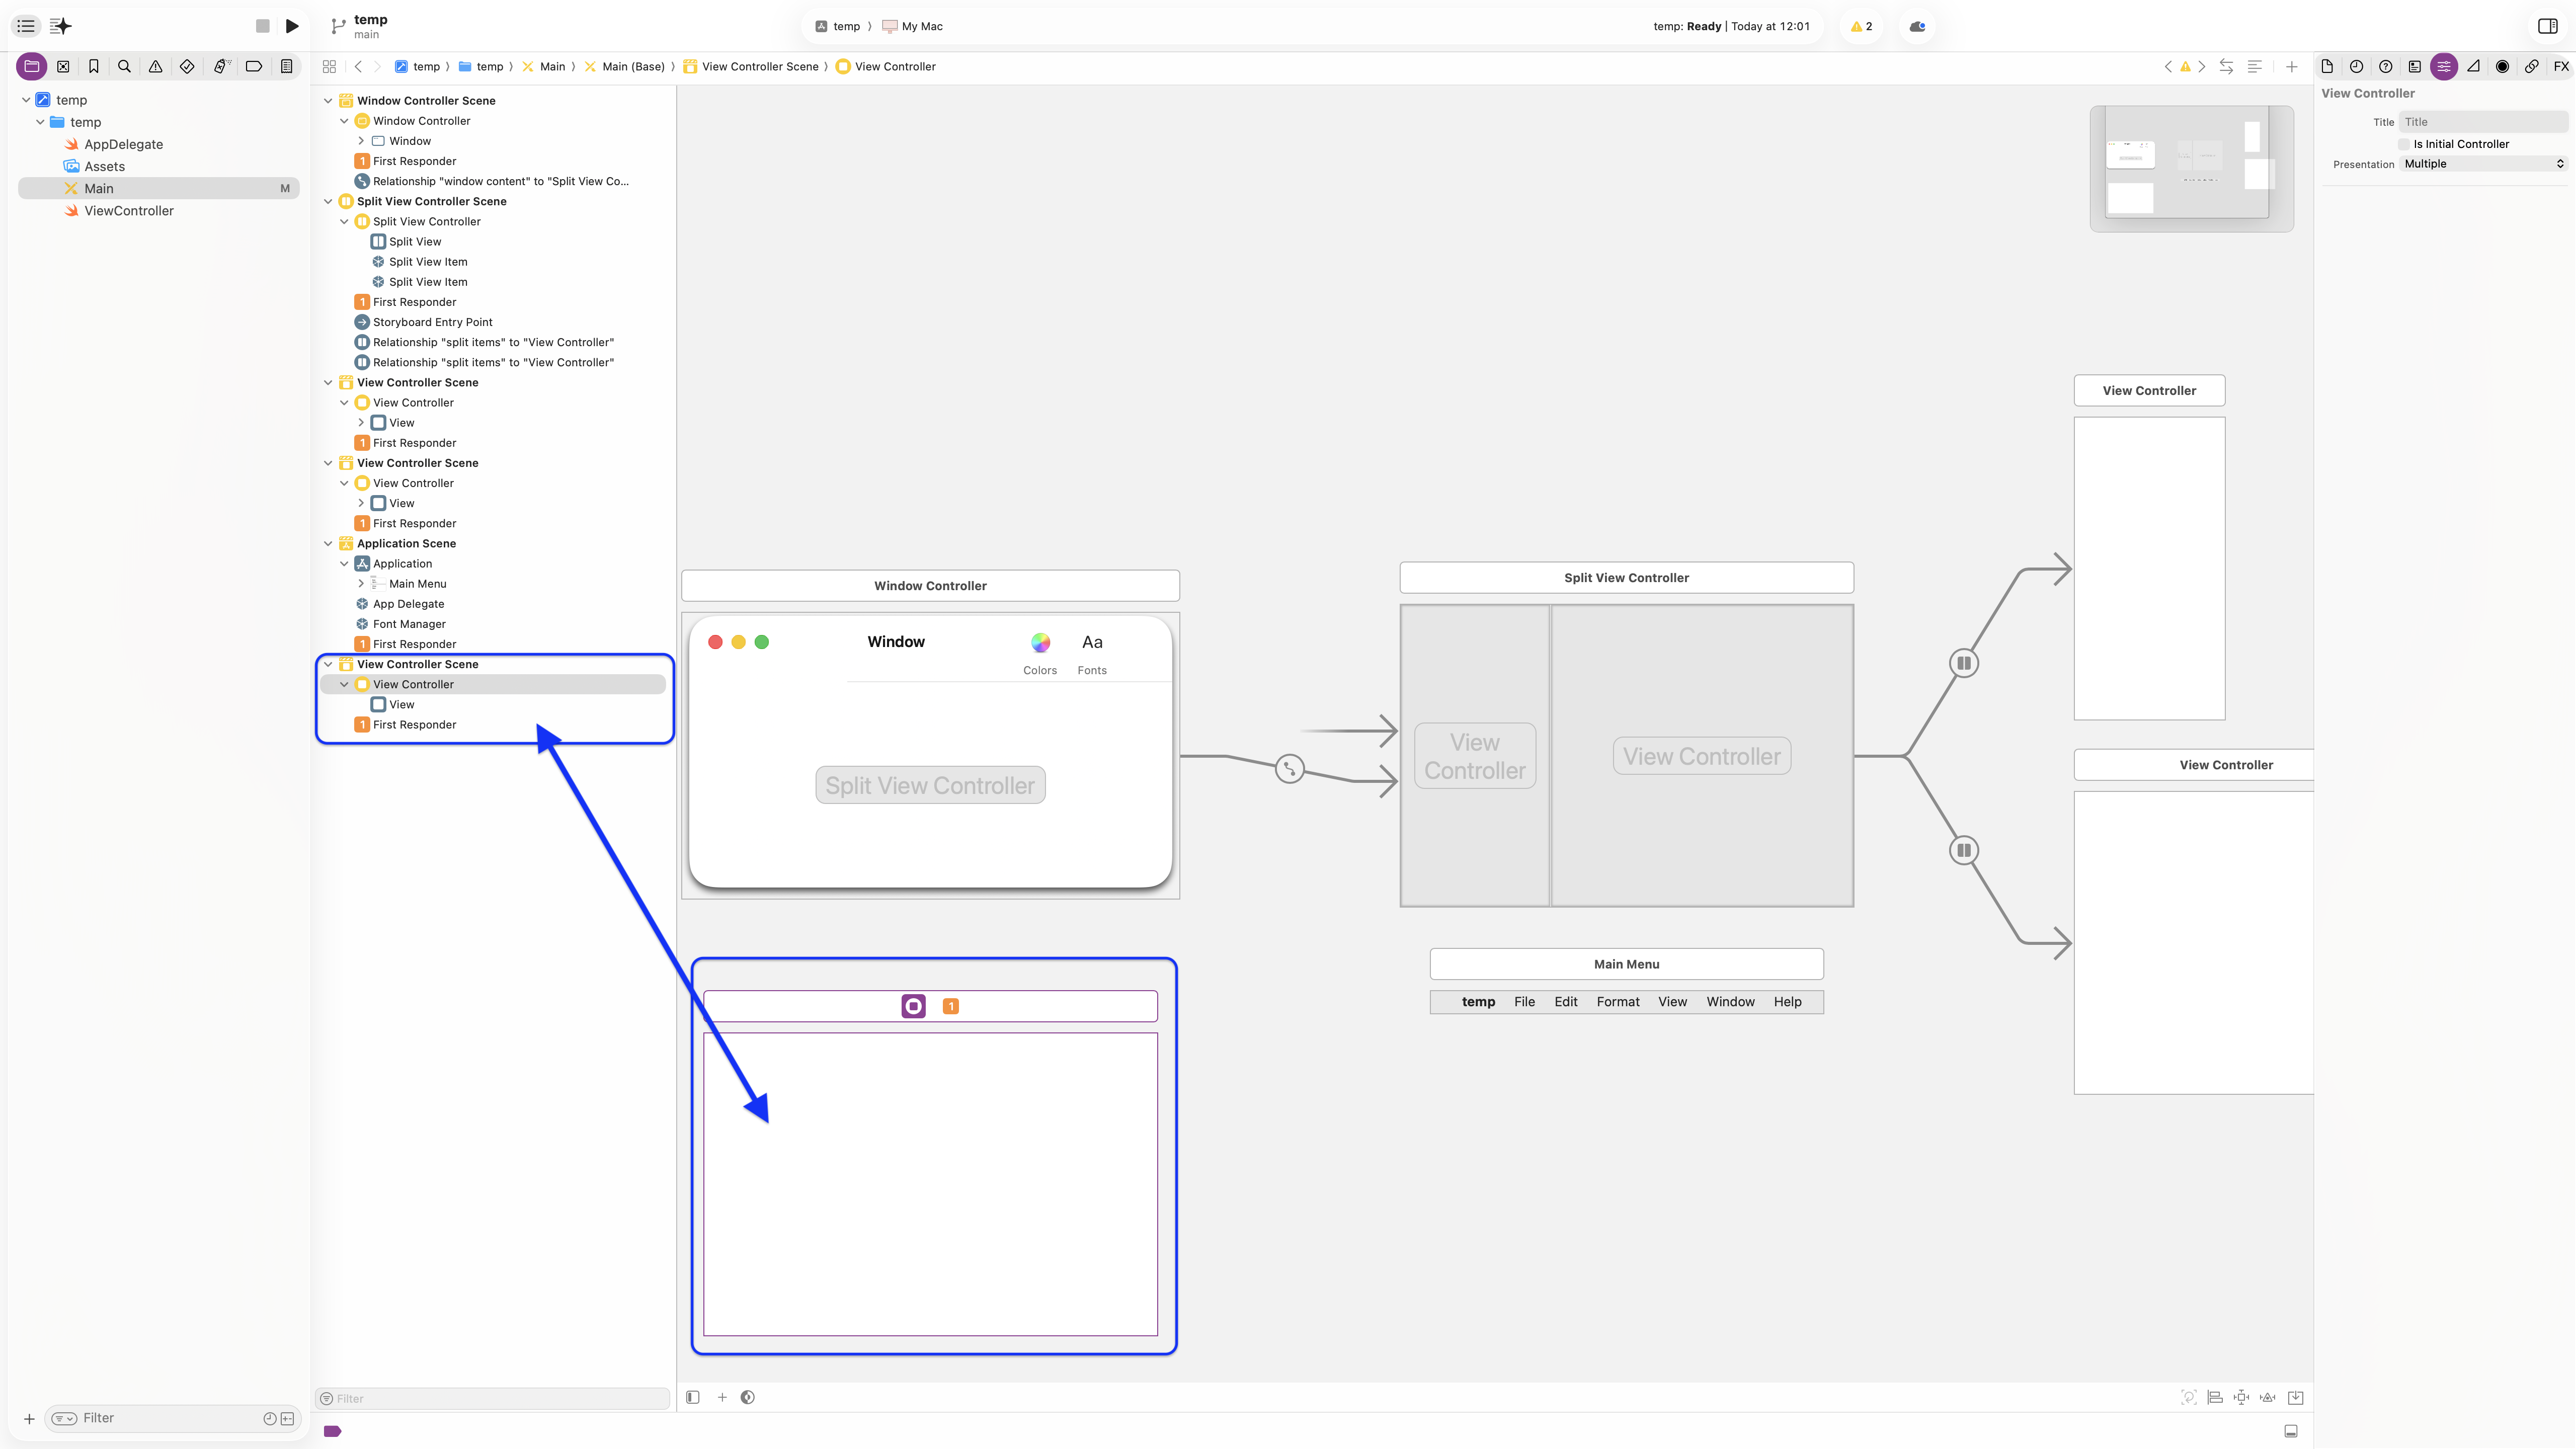
 Use the Show Library to select a normal
 ViewController:
 and drag that onto the bottom of the Document Outline as shown next:
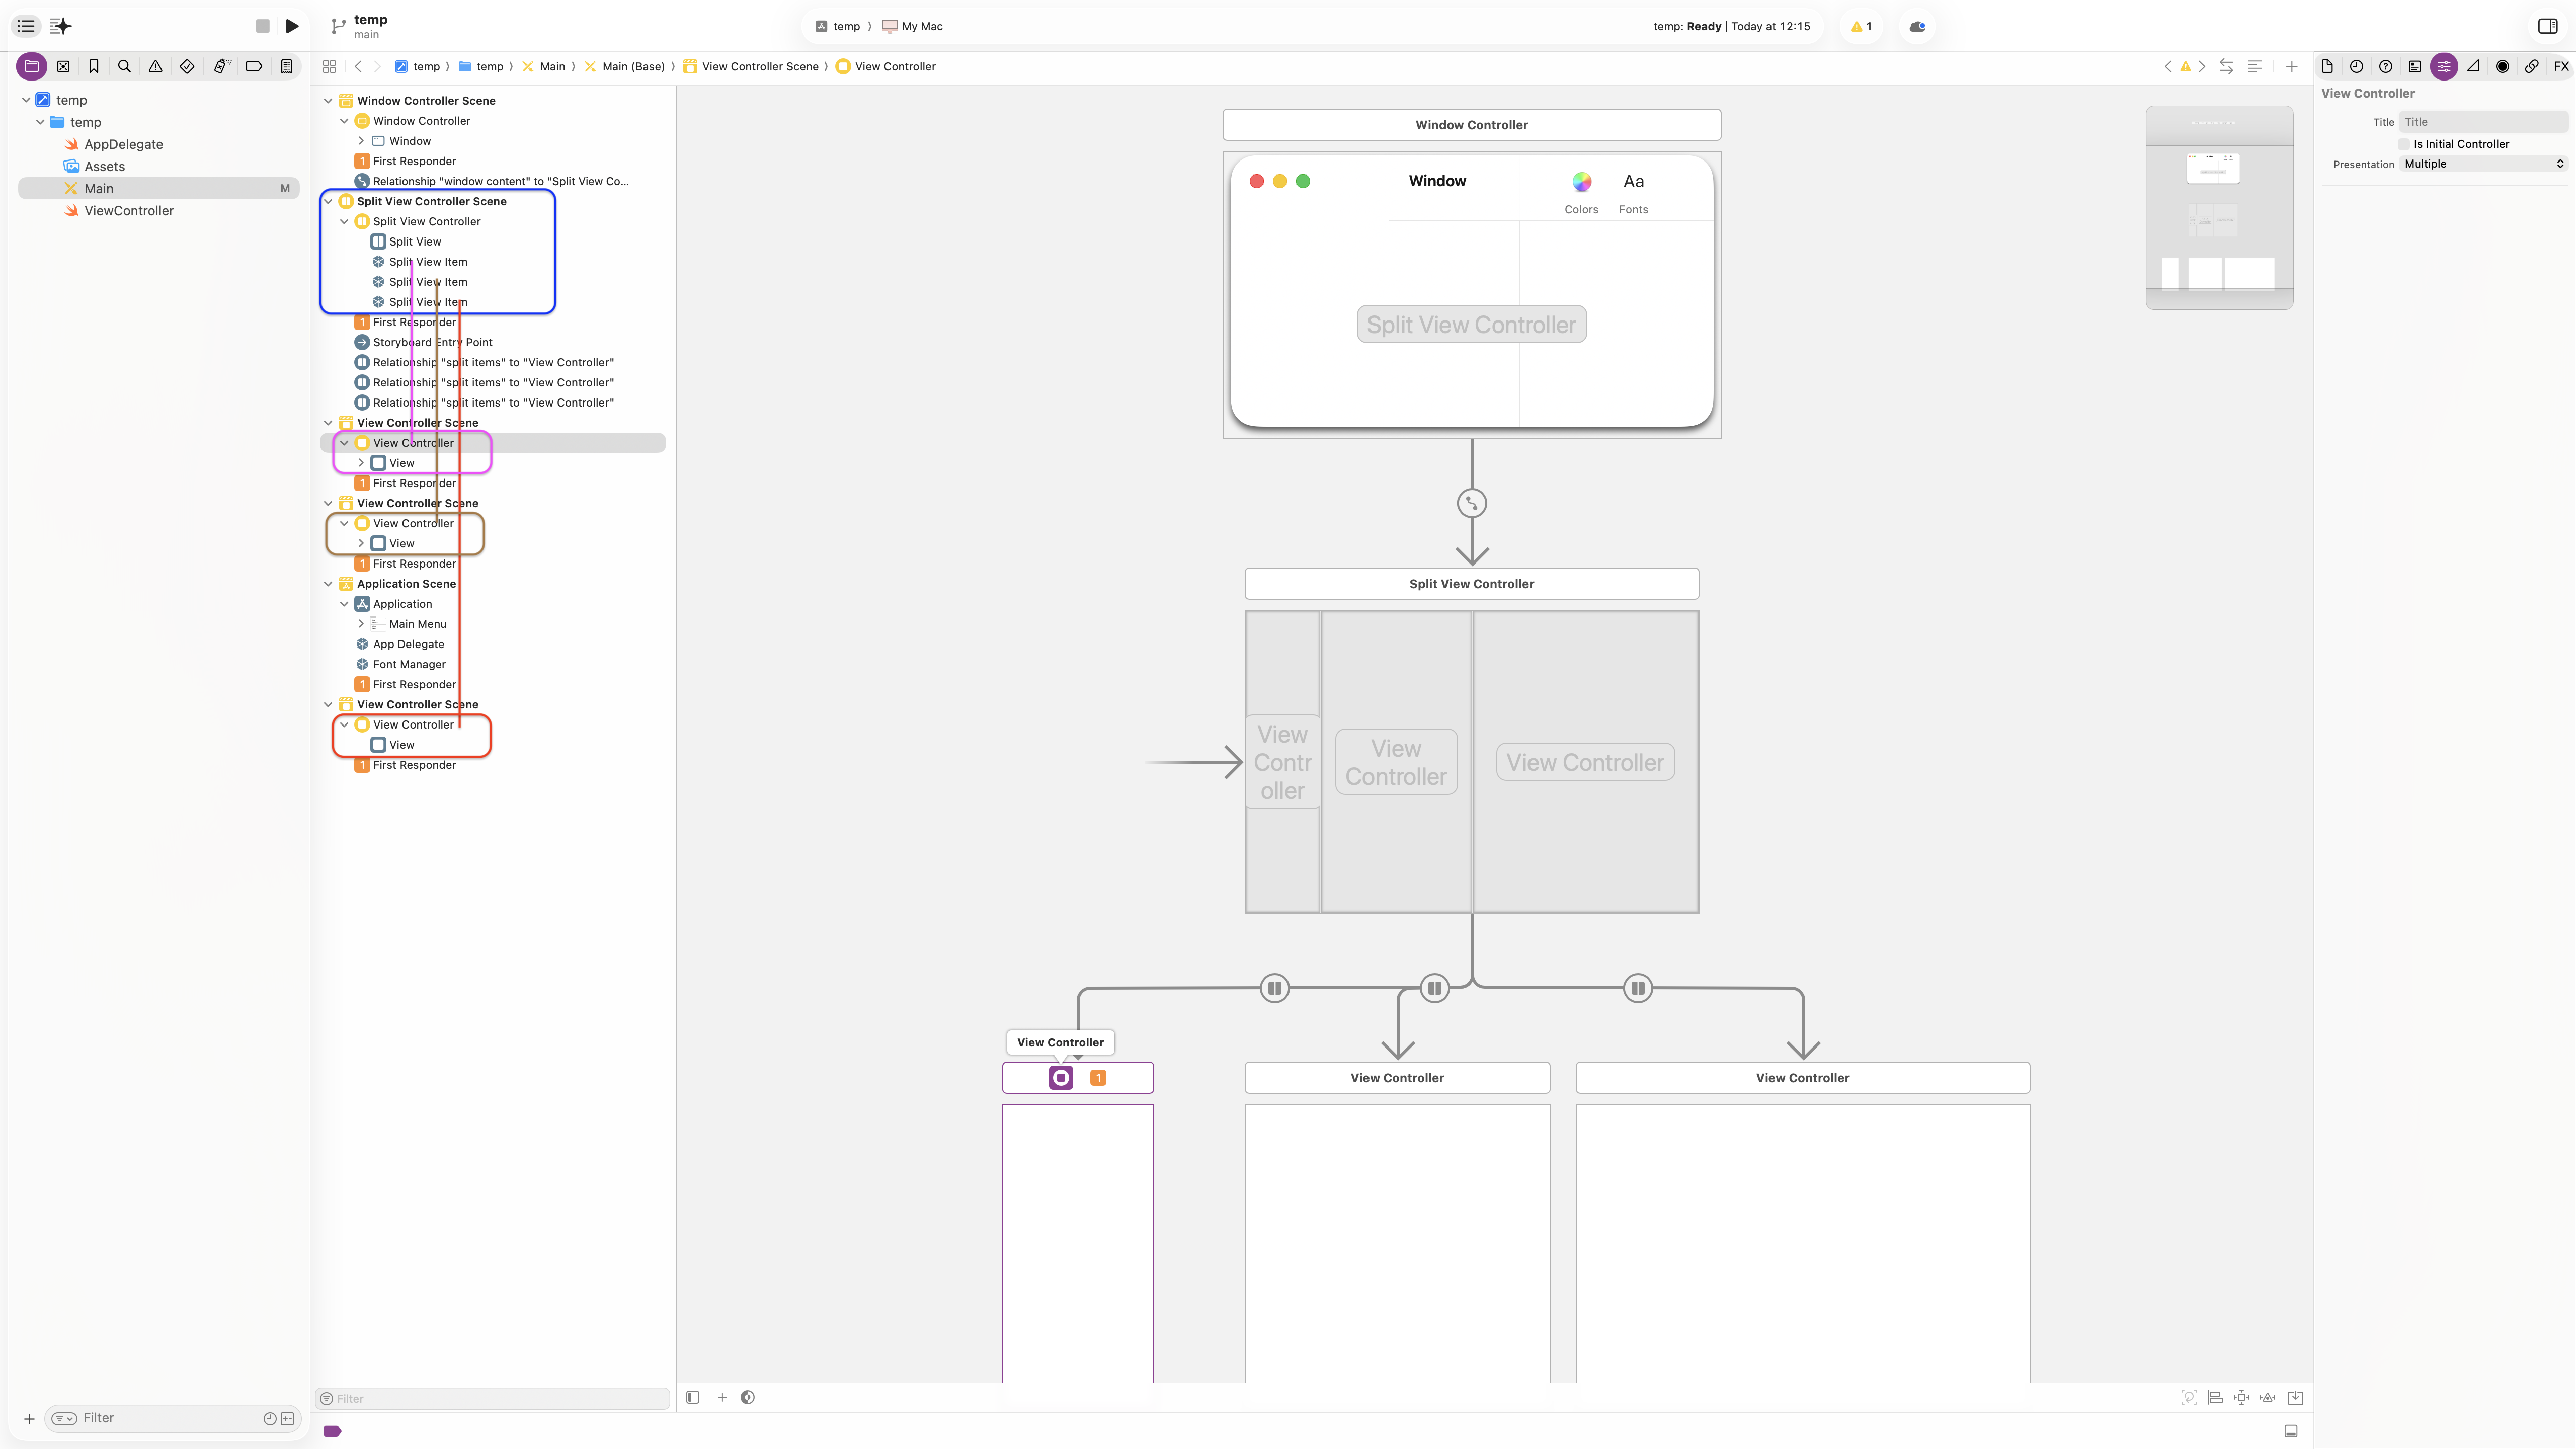
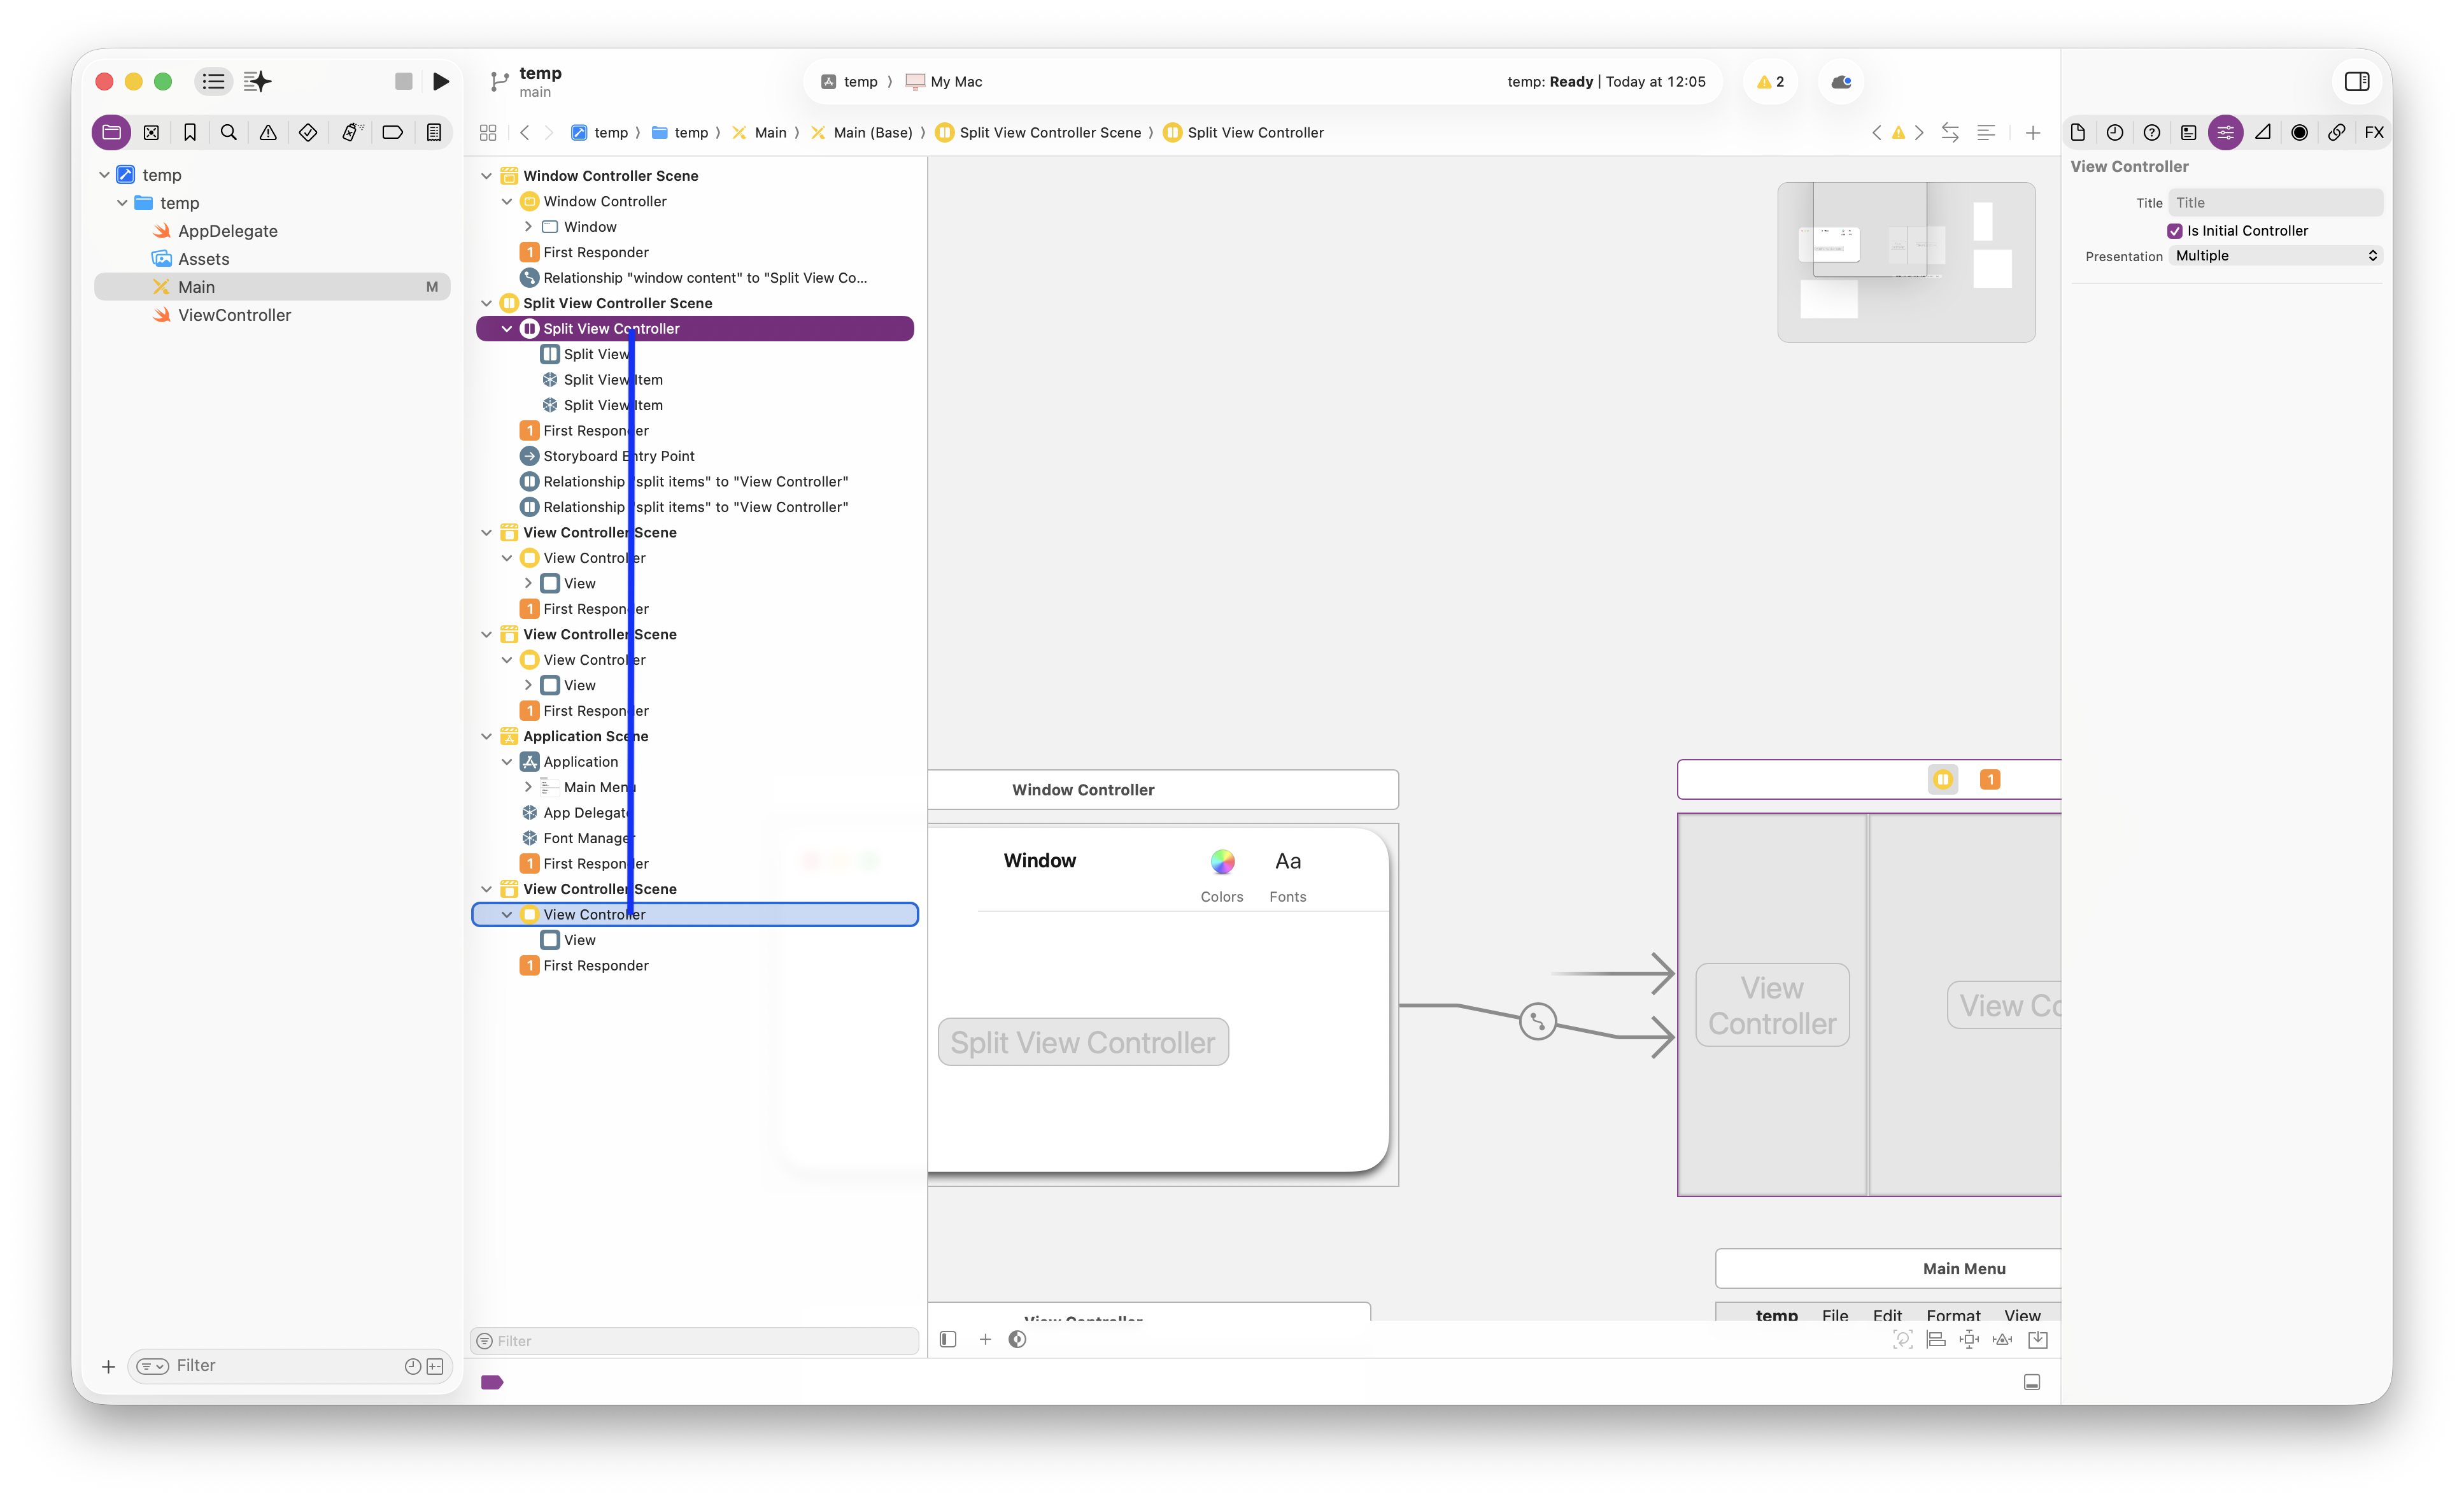
 To create the third split view visual hierarchy, click on the
 Split View Controller in the Document Outline. It is important that you first click here before beginning the CTRL-drag action. Having clicked on the Split View Controller, press the CTRL key and, without releasing the key or the mouse press, drag down to the new View Controller as shown:
 Release the mouse over the
 View Controller and select the menu popup Relationship Segue Split Items:
 That adjusts the two-way Split View in the
 Split View Controller into being a three element one. I have adjusted the visual layout to place this new View Controller to the right of the previous two panes produced from the normal (two-way) Split View Controller.